Tutorial: Converting Spreadsheets into JSON - Step 4
The fourth and final step in our data cleaning tutorial is to convert the filtered data set into a JSON file.
All of the steps in the tutorial so far:
We will use the Wrangell Data tools to convert the data set, and then save the JSON file.
We will pick up where the Spreadsheet Splitting tutorial left off, with the two split data sets that were created. We only need the first data set for this tutorial.
Starting Data Set
We are going to use the first split data set from the Spreadsheet Splitting section of the tutorial. The download for that file is here:
- Split SEO Data Part 1: The first part of the filtered data set.
You can explore the data set in a spreadsheet application before we start the tutorial, if you would like.
Upload the Data to the CSV to JSON Tool
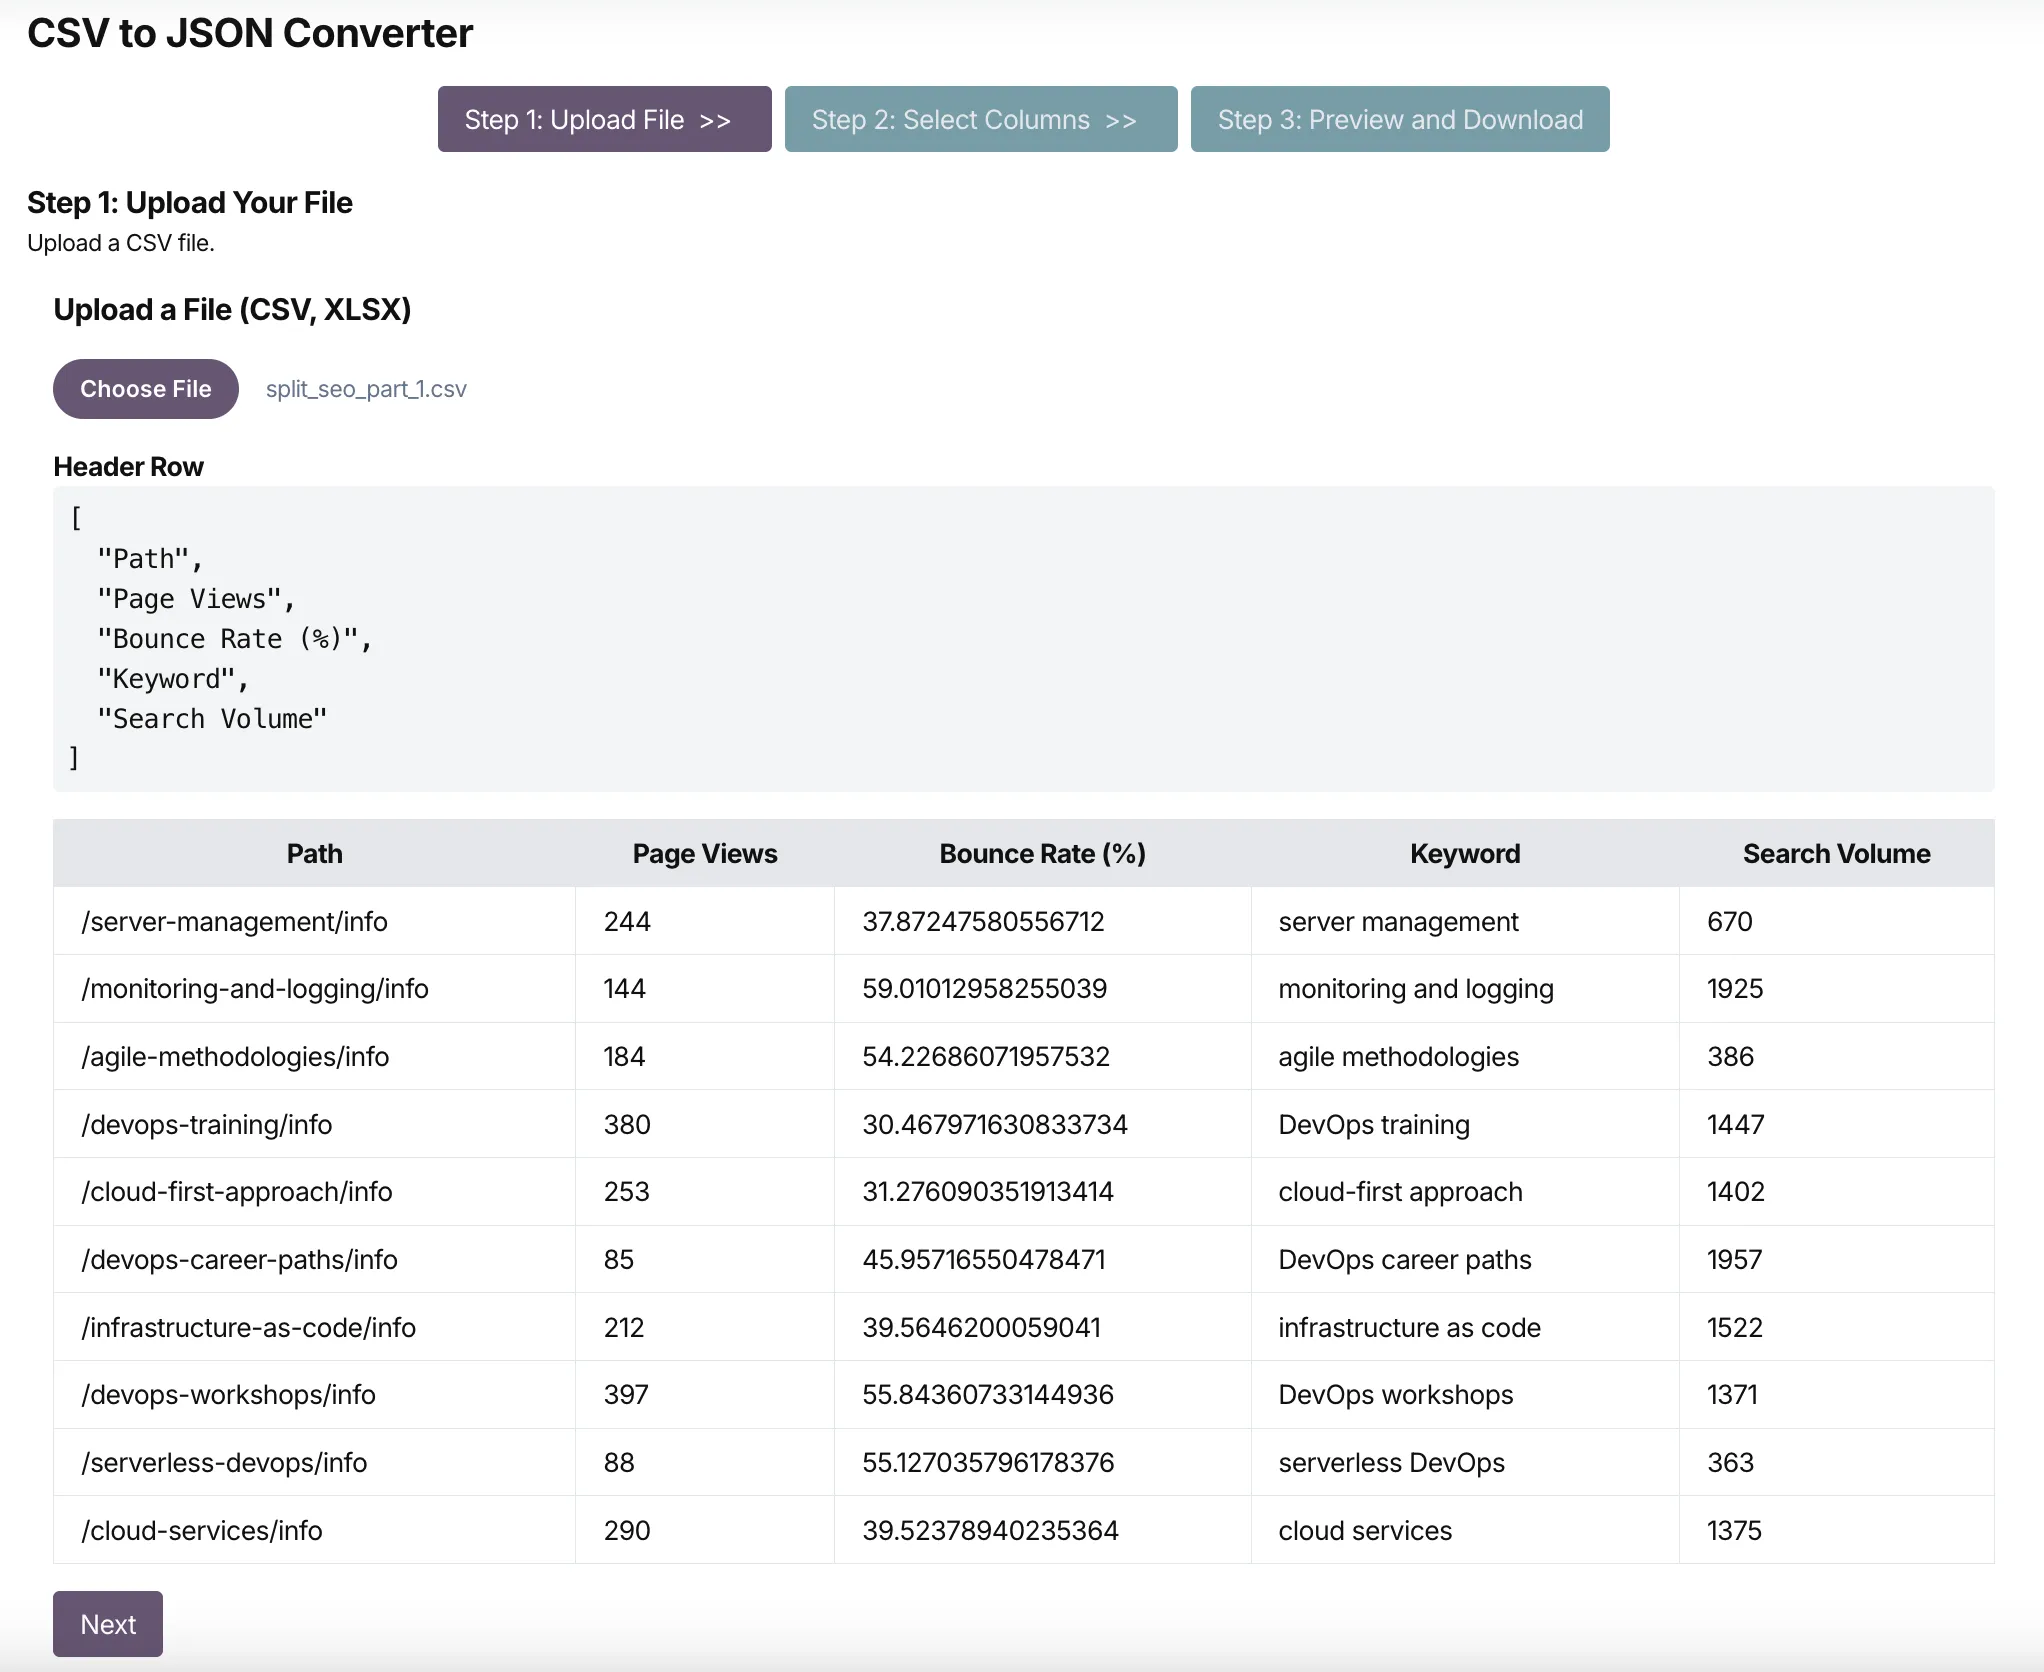
Visit the CSV to JSON tool and upload the downloaded data set.

The upload process show you a preview of the data in the file. Click the Next button to move on to the next step.
Selecting Columns for JSON Conversion
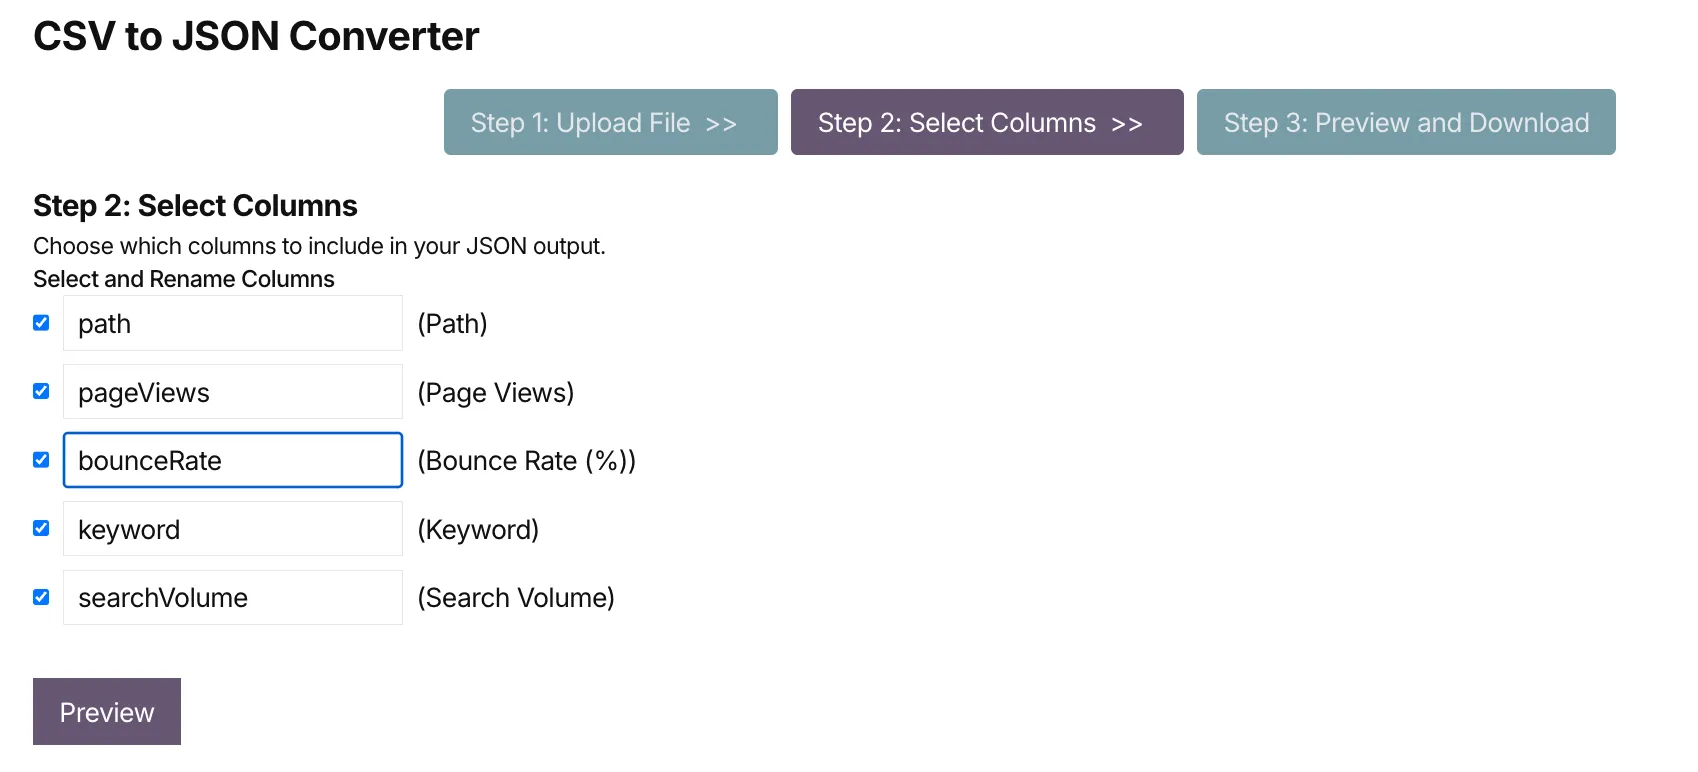
Wrangell Data will display a column picker tool that allows you to select which columns you want to include in the JSON conversion.

Wrangell Data will rename the columns to make them more JSON-friendly. You can see the original column names and the new column names in the data preview.
We do need to change the column name for Bounce Rate (%) to bounceRate to make it more JSON-friendly. By default, you’ll see the (%) in there, and that won’t be useful for most applicaitons.
You can also rename any of the columns here, or simply not include them in the JSON conversion.
Click the Preview button to convert the CSV to JSON.
Previewing and Downloading the JSON Data
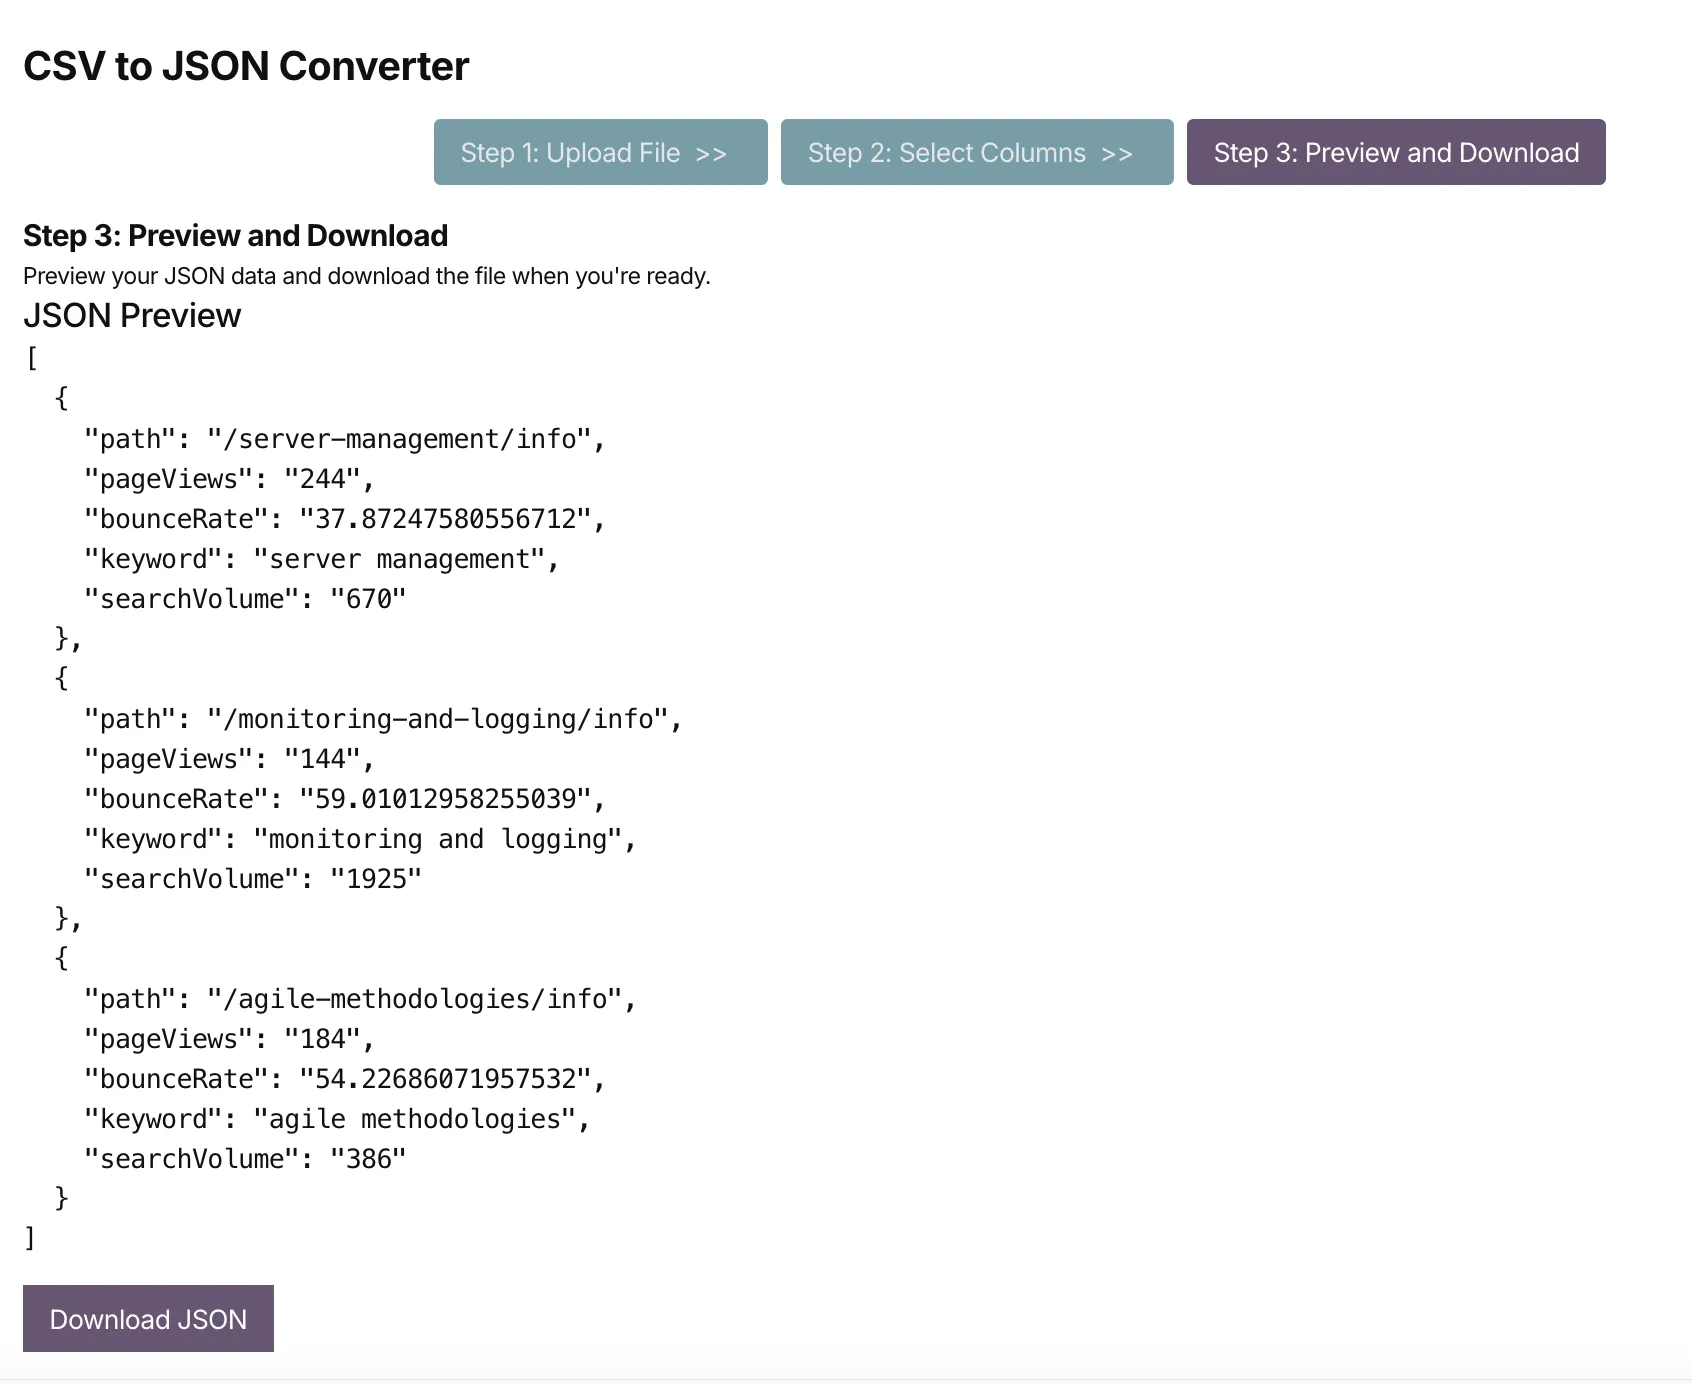
The last screen displays a live preview of the JSON data that will be created from the CSV file.

If you are happy with the JSON data, you can download the JSON file by clicking the Download JSON button.
That wraps up our four-step data cleaning tutorial! You have successfully converted a filtered data set into a JSON file.
